“My Old Window Is Jammed. It’s Such A Pane.”
If you love old houses, you love the appearance and character of the original windows too. That’s not surprising since windows are one of the most important, character-defining features of historic homes. Unfortunately, issues of energy efficiency and repair and maintenance can lead homeowners along the path to replacement windows. But, unlike old wooden windows, replacement windows cannot be maintained to extend their lifespan. Once a replacement window fails, all you can do is buy another one.
Read on to learn more about your historic windows and how to restore them. Maybe you will think twice about replacing them!
What to do When Your Historic Windows Need You
If you want to keep your home’s “neat, old windows”, a storm window increases the energy efficiency of the original window and helps protect it once it has been restored. For many historic homes, then, the trick is in the restoration.

The windows at Lead Agent Adam Sanregret’s latest home restoration project in Camp Washington, Cincinnati
If you have historic windows in need of TLC, there are businesses in Cincinnati that do window restoration. Like Pickens Window Service, for example. It’s a family-owned business in Mount Healthy founded over 60 years ago. You can also click here for a list of additional window resources.
However, historic windows were never intended to be beyond the average homeowner’s maintenance and repair skills. One hundred years ago, it was common for a homeowner to take care of his windows himself. Today, people that can fix historic windows are both patient (by necessity) and “handy”. Knowing one of them is much like that one friend you have with the pick-up truck.
Historic Window Design and Functionality
The typical historic window has two main components. These include the frame, which is the outermost area or casing, and the sash, which is the inside part that holds the glass. Parts of the frame are as follows:
1) the head or horizontal top section
2) jambs or vertical sides
3) the sill, which is the part at the bottom you like to rest your plants on

A peek into the jamb or vertical part of a window frame
Most historic windows are either single-hung or double-hung. A single-hung window has one fixed sash on the top and one sash that can move up and down on the bottom. The bottom window slides up partially covering the top sash when opened. A double-hung window has two stacked windows that can both move up and down independently of one another.
Double-hung windows are great for cooling your home. Push the bottom window up and the top one down and it allows for circular airflow. Hot air goes out the top and cool air comes in the bottom. Add a ceiling fan and you are good to go!
Inside the window jambs, there is a system of pulleys, rope cords or chains, and weights. This system helps to open and close the window. If you had Superman’s type of X-ray vision (i.e., you can see through solid objects!), this is what you would see in a typical double-hung window frame:
- Two window sashes attached to and suspended by lengths of rope cord (or a chain)—two sashes, two sets of cords.
- Each cord passing over a pulley installed in a hole or cavity in the window jamb near the top of the window opening.
- The cord ends attached to iron, steel, or lead counterweights, usually with the poundage stamped on it. Sometimes you’ll find a thin strip of wood placed vertically to divide the two sets of cords on each side of the window.
- Counterweights located in a concealed space or weight pocket.
Window weights
The 3 Biggest Problems for Historic Windows
Three main afflictions trigger window restoration. Here they are—from least serious to most—and what to do about them:
#1 The Window Won’t Stay Open
Congratulations, your window is still functioning. When a window refuses to stay open where you want it, it is because the counterweight is no longer accurate. Each counterweight weighs one-half of the sash it is balancing. If the balance is off, the window glass has likely been replaced. Historic glass is generally thicker and heavier than modern glass. Look for ripples or waves in the window glass; If you don’t see any, chances are it’s modern. Restore the balance by either tweaking your counterweights or installing heavier glass, and your window should cooperate.
Tip: You can buy modern window glass of varying thickness, or architectural salvage places sell old sashes with intact glass you can reuse.

Architectural salvage places sell old window—chances are you will find a piece you can use.
#2 The Window is Jammed
If your window is jammed—which means it is not opening—your first step is to check to see if it has been nailed or painted shut (it happens). If so, your first restoration step is to set it free.
Lacking nails or paint, there are several other possibilities:
- The counterbalance cords are tangled. Sometimes they manage to get tangled by themselves, but sometimes you find insulation or paper materials in the weight pocket. This is a poor attempt to increase energy efficiency by a previous owner.
- A cord broke and the counterweight has fallen off. This is due to stress on the cord by the counterweight over time.
- Exposure to the elements, especially moisture, has warped the wood and the window will not budge. This is due to neglect (see #3 below for the solution).
- Your home settled over time. The fix may be as easy as finessing the frame and sash wood—much like addressing a sticky door—so the window can work again. However, the settling may or may not have caused other bigger problems too. It may be best to bring in a historic window professional and go from there.
A broken rope cord and counterweight
#3 Historic Window Neglect
With or without storms, historic windows still require regular maintenance. This entails more than cleaning the glass so you can see outside. Time, exposure to the elements, and sunlight are key villains here.
Exterior wood surfaces need regular refinishing and gaps around the frame can be caulked. This goes a long way to protect windows and helps prevent water from getting in (leading to warping or wood rot).
Glazing putty holds the window glass within the sash. Over time it can fall off or become badly cracked, again leaving your windows vulnerable to the effects of water and rot. With a little practice, window reglazing is a skill most everyone can add to their arsenal.
Are you wondering if it is really that easy to restore a window? Continue on for a true story about some very challenging windows…
A Queen Anne’s Curved Windows
Lead Agent Adam Sanregret has seen his share of old windows in disrepair and needing restoration. He’s been a realtor for 18 years and working on his 6th historic home restoration project (click here for the start of the blog series documenting his journey). You would think he would fall asleep counting old windows, instead of sheep!

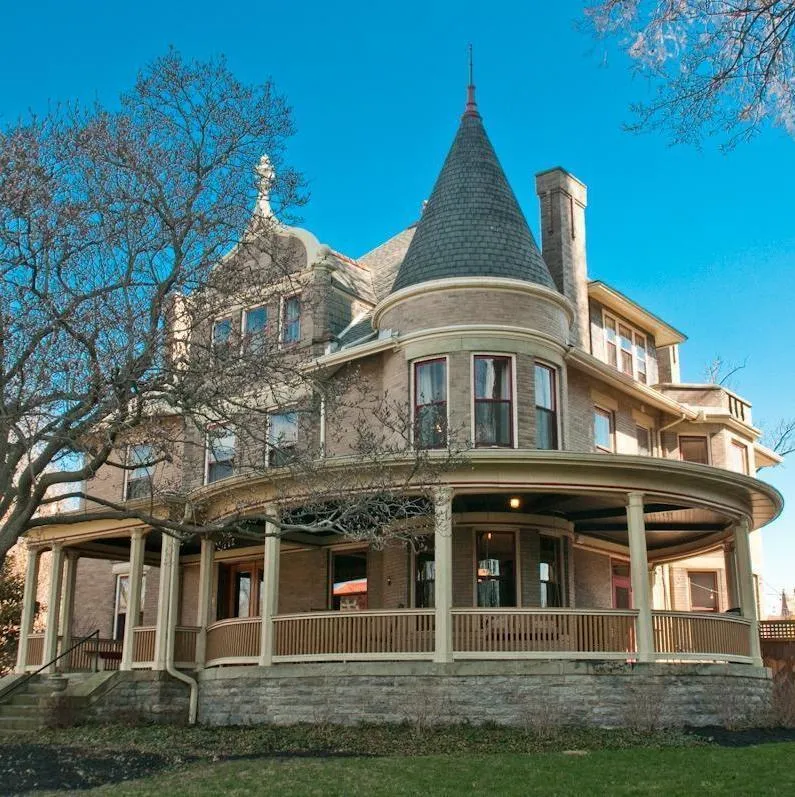
The 1890 Victorian that Adam restored in North Avondale, Cincinnati
From 2007-2017, Adam restored his beautiful 1890 Queen Anne Victorian in North Avondale, Cincinnati. As striking and gorgeous as the home’s front turret is, it also came with the original curved windows—and no storms. Adam estimated that the windows were neglected for over 40 years until he came around.
The price of curved storm windows are partly to blame. One quote that Adam got for storms with plexiglass came to over $2,000 per window. To compare, the average homeowner can expect to pay anywhere from $250 and $600 per window.
During Adam’s home restoration (check out our Rose Hill Restoration page), the curved windows were a burr in his side. The window sash was in such poor condition, it was sagging. Cincinnati winters are typically mild, but Adam does remember that one year when it snowed in his house!

Nothing sadder than a sagging sash.
In the end, Adam successfully restored the curved windows with the help of a “handy” friend (remember, people that can restore historic windows are good to know!).
Here is a summary of the work, in 10 “Easy” Steps:
1) Remove window sash
2) This job started with soaking the windows in a kiddy pool to then mold the sagging sash back to its original form
3) Extract glazing putty and points from around the glass and remove glass pane (not breaking curved glass = priceless!)
4) Remove paint on wooden sash and clean hardware
5) Apply epoxy consolidants and fillers where wood is in poor condition
6) Sand, then clean and prime sash
7) Return glass pane to the window sash and apply new glazing points and putty
8) Let cure
9) Paint window sash with an exterior color of choice
10) Reattach ropes and install sash (most profanities occur here)
And voilà! Finished!
Still thinking about restoring your old windows? Email or give us a call. We’d be happy to answer any of your questions.
(Revised from October 4, 2013)

Curved window sash taking a soak in the kiddie pool